I was given product to review in exchange for this tutorial. All opinions are my own.
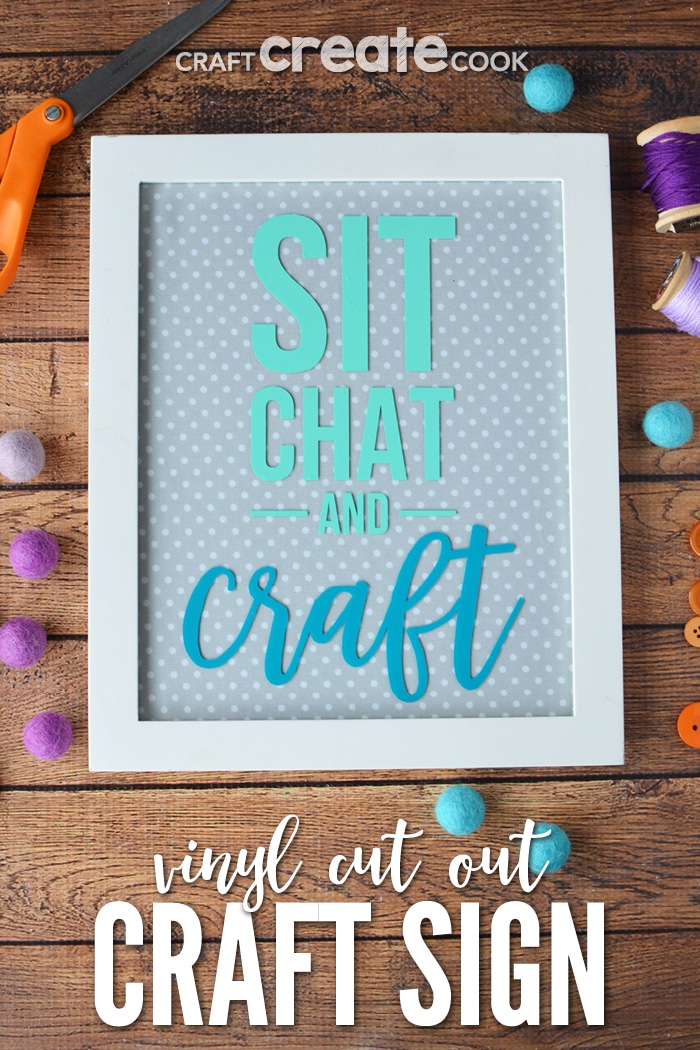
Make your own vinyl crafts with Silhouette! Yes, It's easy to cut vinyl with this amazing machine and today I'm showing you how to make this cute and easy craft sign!
My Craft Castle is a work in progress. To me, it's been a laundry room, but at one time, it was an upstairs bedroom the previous owners turned into a laundry room. They put amazing cabinets, shelving and a desk in that space, so I have named it my Craft Castle. Now I cannot take 100% credit for "Craft Castle." I follow The Honaker Home on Instagram and she statred using that phrase so I stole frequently borrow it it.
But my Craft Castle walls are in need of painting and I'm not quite ready to work on that yet, but I'm beginning to create items to hang on the wall. I knew I needed an easy craft sign that was witty and fun so I created this with vinyl and the silhouette cutting machine! An added bonus is that I give you the silhouette file here so you can easily make your own craft sign using Silhouette's Software! Now let's get started!
Once you become familiar with your machine, loading and unloading it, cutting a test piece of vinyl, you're ready to start making fun vinyl crafts with silhouette! Just be sure to test it out before you jump into this project. Otherwise you might become easily disappointed.
How to Make a Silhouette Vinyl Craft Sign
Materials:
- Silhouette Cutting Machine
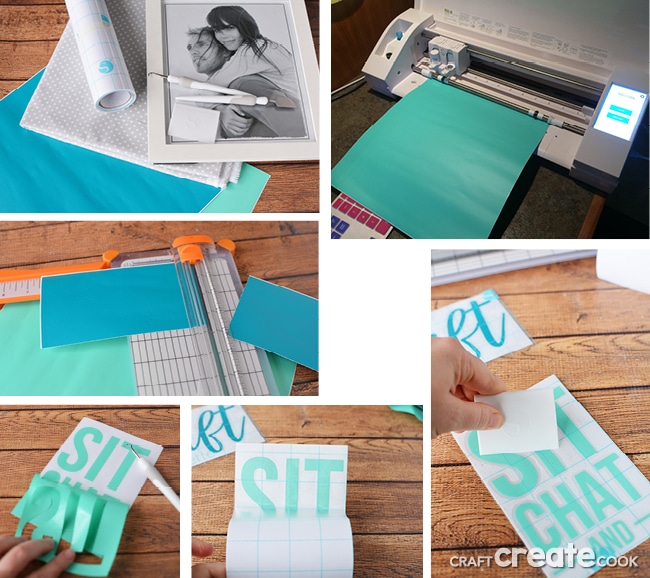
- Vinyl Sheets, in 2 separate colors if desired (I used the teal and light green from this sampler)
- Transfer Tape
- Silhouette hook and scraper tools (very helpful but optional)
- 8x10 frame
- Fabric
- Scissors
- Masking or Painter's Tape
- Paper Trimmer
- Ruler or Tape Measure
- Pencil
Directions:
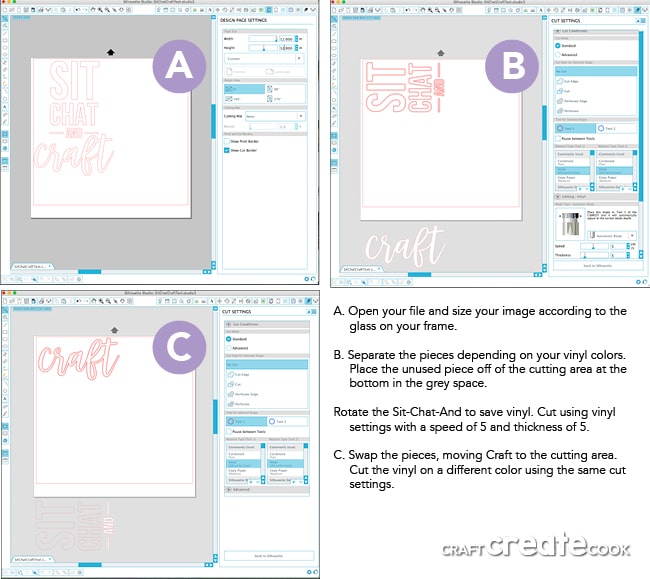
- Use the supplied file to cut your vinyl. Since I used two different colors, I simply moved the words off of the cutting area, cut one color and then swapped the set of the words to cut the other color. I also rotated the Sit-Chat-And text so it wouldn't use so much vinyl. I sent my automatic blade speed to 5 and thickness to 5 and it cut the vinyl beautifully. Repeat with the other color to cut craft.
- Use a paper trimmer to trim the vinyl to a smaller, more manageable piece.
- Use the hook tool to remove the background of the vinyl on each piece.
- Cut a piece of transfer paper to the size of your vinyl and adhere to the front of the letters. Use the scraper tool to firmly adhere the transfer paper to the letters. Use a tape measure to mark the center of the piece of vinyl and make a mark with a pencil right on the transfer tape.
- Take apart your frame and place the frame paper insert onto the fabric. Cut the fabric using the paper as a template for the size of the fabric. Place the fabric in the frame, behind the glass and close it up.
- Set your picture frame onto a flat surface, face up. Make sure the glass is clean and dry (use a window cleaner if necessary).
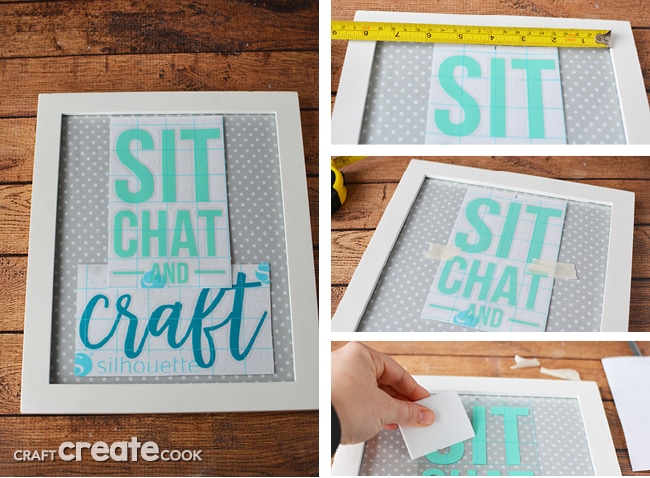
- Measure the opening of the frame and find the center. Place the top vinyl piece onto the center of the frame adjusting from top to bottom as necessary. Place the second piece of vinyl onto the glass just to get a visual as to how it will look. Attach the top vinyl to the glass with masking or painter's tape. Remove the back of the vinyl from the top piece. Gently peel it away and Repeat for the bottom piece. Use the scraper to make sure the vinyl is even and adheres to the glass well. Peel away the transfer paper and discard.
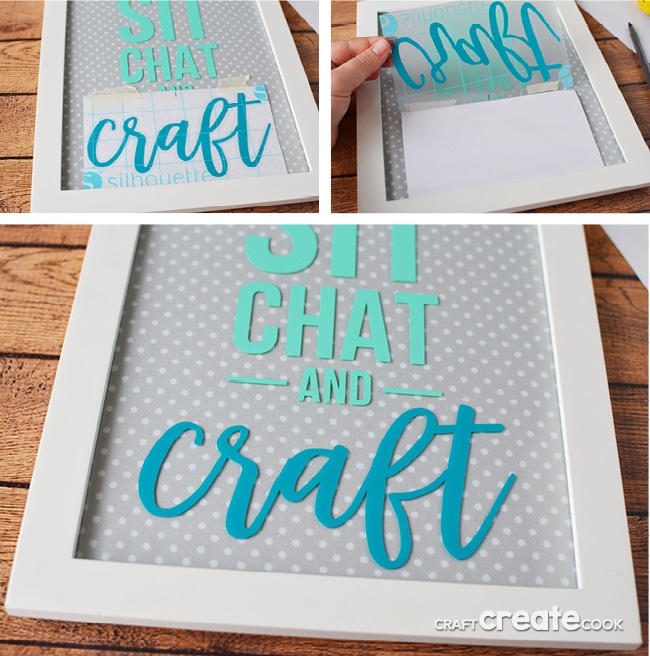
- Repeat with the word craft, centering it in the space, affixing it to the glass with masking tape and removing the back. Smooth the front with the scraper tool and remove the transfer tape and discard.
- Enjoy your craft sign and hang it in your own craft castle or give it to a friend!
If you need more vinyl craft with silhouette inspiration, visit their blog and be sure to check out Silhouette America on social media!
Facebook | Pinterest | Instagram



Leave a Reply