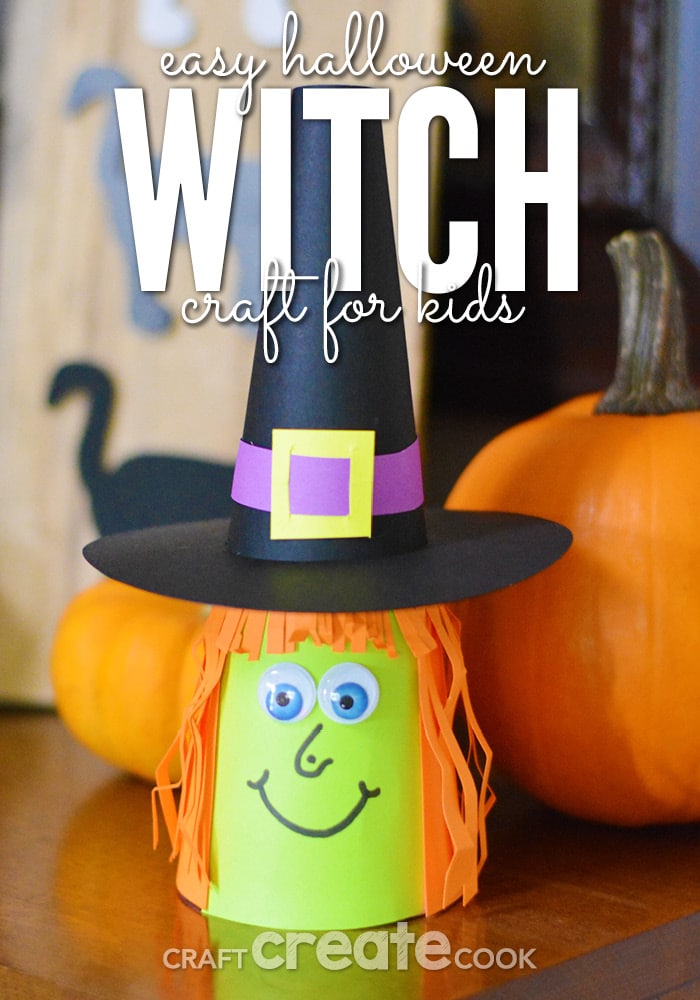
This paper witch Halloween craft is a fun project to work on with your kids! Have them add their own personal touch to make a unique witch to add to your home decor.
Are your kids excited about Halloween? Because mine are! We've had our costumes for over a month - my oldest is going to be a unicorn and my youngest is going to be Superman! It should be fun! One thing I like to do during the holidays is make crafts with my kids. This paper witch Halloween craft is perfect to display with your Halloween decor!
My daughter loves to craft and making these paper witches made her eyes light up! She was so excited to help me! We worked together to cut out shapes and add the face onto our paper witch so she turned out just right! Then we proudly set her on a shelf in the living room and when she walked by our Halloween craft, she said, "She's so cute, Mom!" And she was right.
How to make a Paper Witch Halloween Craft
Grab a few supplies and you're on your way:
- Floral Cone (we grabbed ours from the Dollar Tree. It measures 6.9" x 2.9" and was only a buck!)
- Cardstock in the following colors: Black, Green, Orange, Yellow and Purple
- Google Eyes
- Low Temp Hot Glue Gun
- 5" diameter Circle Template such as a lid
- 2-¼" diameter Circle Template such as a drinking glass
- Paper Trimmer
- Pencil
- Scissors
- Black Marker
Use these directions as a simple guideline to making your witch. Add your own special touches with different colors and give your witch her own unique personal style.
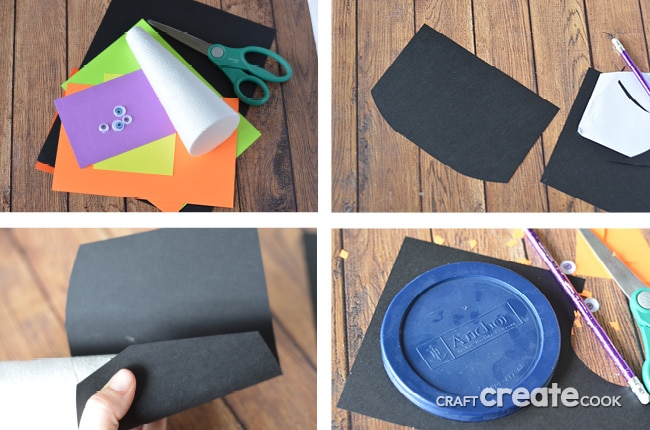
- Cut a piece of black card stock to 5" x 7.5" and curve the ends as shown. Wrap the paper around the top of your cone to make sure it fits.
- Cut a 5" diameter circle out of black card stock. Cut a 2-¼" diameter out of the center of the circle. Slide the circle onto the cone and see where it falls. Mark the space with a pencil.
- Attach your black hat paper using hot glue. Use the pencil mark as a guide as to where to place the hat paper. Slide the brim onto the cone. My brim sat about 4" from the top of the cone.
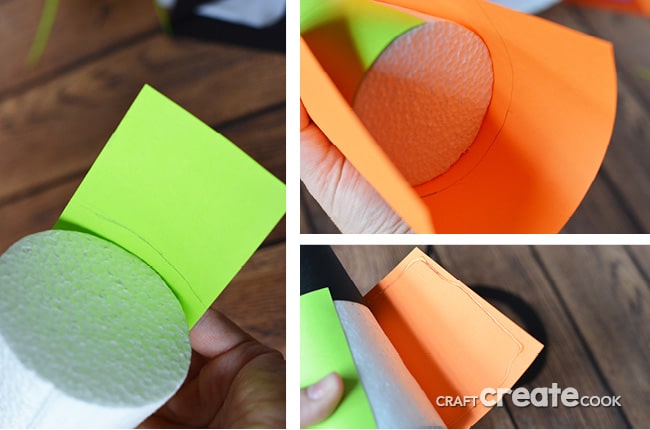
- Place a 2-½" wide piece of green paper onto front of the cone. Use a pencil to draw a mark to cut the paper. Attach the paper with hot glue.
- Cover the back and sides of the bottom portion of the cone with orange card stock. Affix with hot glue.
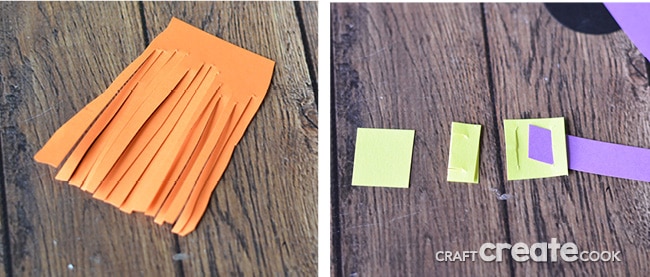
- Cut two pieces of orange cardstock about the same length as the green piece. Fray them with scissors and cut the ends to be uneven and look like hair. Cut a small piece for bangs. Attach with hot glue to the orange section of the sides of the face and across the top for bangs.
- Cut a small square of yellow card stock, fold in half and add slits with scissors as shown. This creates the buckle.
- Cut a strip of purple paper that fits into the buckle and weave it through. Attach to the hat with hot glue.
- Add eyes with hot glue and draw a nose, wart and mouth on your witch with a black marker.
If your kids have fun making this witch craft, try these others:

Leave a Reply