I was given product to review in exchange for this tutorial. All opinions are my own.
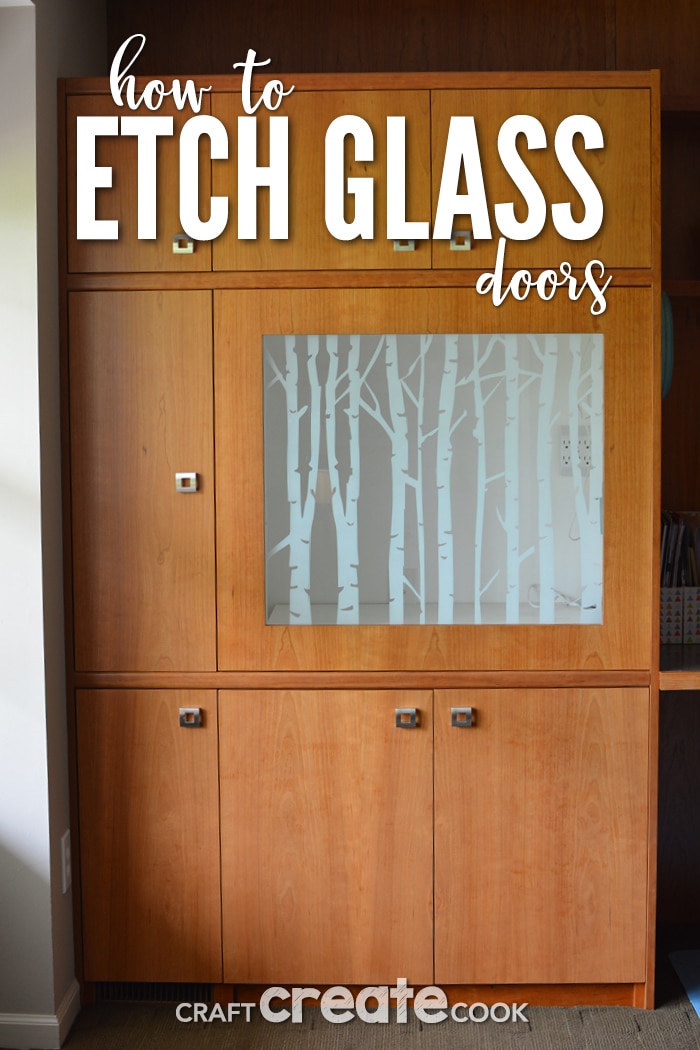
I'll show you how to etch glass door panels for your home, kitchen or office with the Silhouette cutting machine and an extra large vinyl stencil.
Buying a home is a very stressful life event. When my husband and I put our house on the market and we had an asking price offer within 3 days, we went crazy looking for our perfect forever home. We looked. And looked. I think we swapped a gazillion emails and realtor.com home listings. We looked in several different cities, checked out schools, communities, property taxes, township rules, everything. It was stressful but all that hard work payed off when we stopped at an open house on a Sunday in April.
I remember it was a gorgeous spring afternoon, breezy and sunny and the entire family was in tow. My then 5 year old just wanted a house with an upstairs. My 2 year old didn't have an opinion. And I knew we needed shorter commutes and a community we would actually spend time in. My husband wanted a home with an outbuilding. And this one had just that!
One of the things the house listing said was the current owner was a woodworker and he had made several items within the home. The home office has a gorgeous maple desk space and nice built in cabinets. The master bathroom closet has amazing shelving. There's a mudroom with cabinets for storage and lots of shelves. The laundry room has custom cabinets with tons of storage space, too. This was the first house we actually got excited about looking at.
We move into this home in July and although it was move-in-ready, I had a small list of things I wanted to do to make the space our home. One of them was the shiplap kitchen update and the other was turning a TV cabinet in the office into a storage cabinet. I saw this as a perfect place to store the kids games and toys, out of the way and to create a gorgeous etched glass door panel. I removed the TV and gave it away to a family that had a house fire and I began working on how to etch glass door panels.
How to Cut Large Decals with the Silhouette
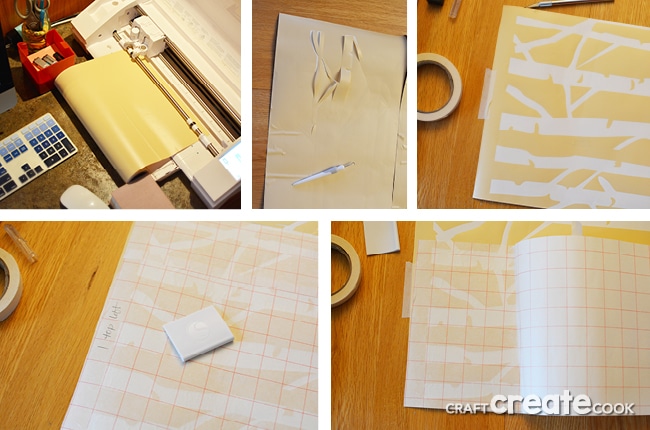
In order to make extra large silhouette decals, I highly recommend you grab a roller feeder. I didn't have one and had to improvise (a memo pad holder and a book, as shown) to keep my vinyl from going crazy. Just make sure you watch it very carefully if you do not have a roller cutter and pause your project immediately if it begins to mis-cut.
Materials:
- Silhouette Cutting Machine
- Roll of Vinyl
- Roll of Transfer Tape
- Scraper
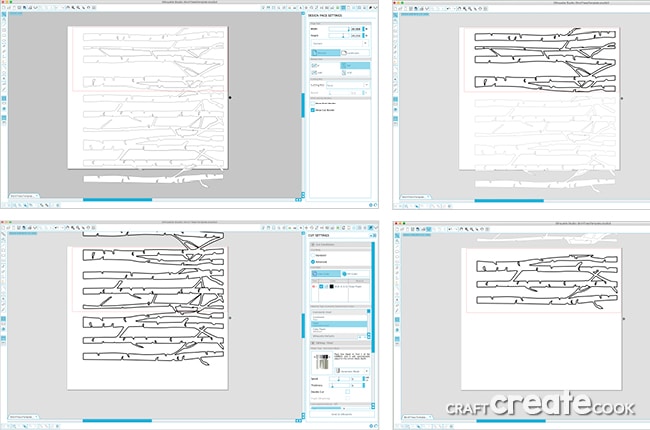
- Measure your area for your vinyl. My glass is 26" x 29.5" and that's the size of my page in Silhouette Studio.
- Once I had my image on the page, I edited the cut area to be the size of my vinyl (12" x 29.5") and used the knife tool in the silhouette software to cut the design at the edge of the red line.
- I then set my machine to cut the vinyl and off it went.
- When my first piece was done, I moved the design off of the cutting area by dragging it to the top into the grey space. I then moved the remaining portion of my design into the cut area and used the knife tool in the silhouette studio software to cut the artwork.
- I cut the vinyl using the vinyl settings on the machine.
- I repeated the process of dragging the image onto the cut area for one final time.
- When I was finished, I had 3 separate pieces.
- Weed the pieces and place transfer tape onto the vinyl. Smooth with a scraper. Label the pieces so you know which one is which and move onto the next step how to etch glass door panels.
How to Etch Glass Door Panels
It's best if you have 2 people for this project as it's much easier to hang onto the stencil and place it onto the glass together. If you had a smaller piece of glass, you may be able to do it with one person.
Materials:
- ⅛" glass door insert (I grabbed a piece of glass at the hardware store for about $5 because my cabinet didn't have glass. I measured 1" bigger than the opening)
- mirror clips and screws
- screwdriver
- Rust-Oleum Frosted Glass Spray Paint
- oversized vinyl stencil
- rubbing alcohol
- lint free towel
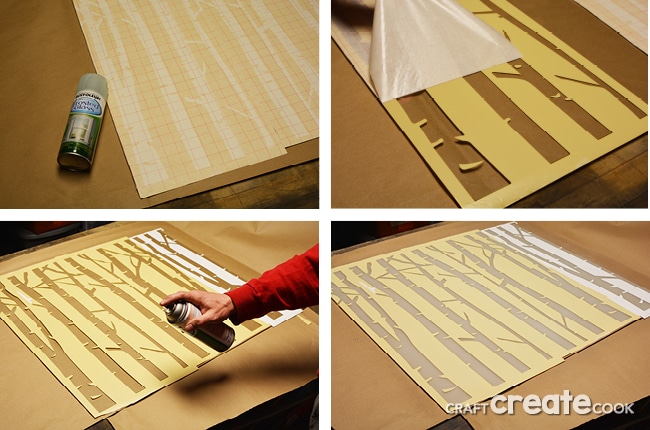
- Clean the glass with rubbing alcohol and a lint free towel. Let dry.
- Place your vinyl stencil onto the glass by removing the backing and gently placing it onto the glass. Smooth with a scraper and remove the transfer paper.
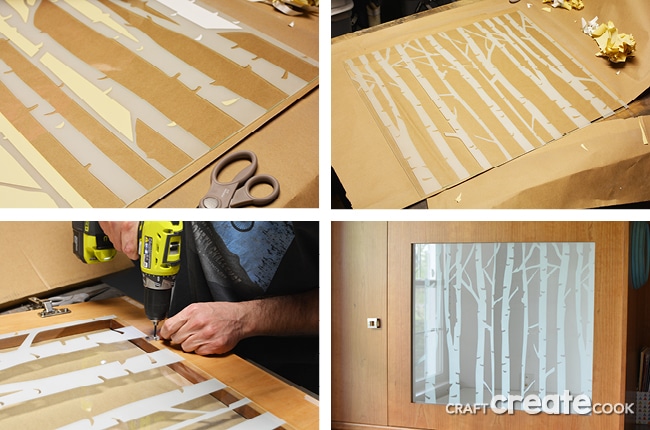
- Repeat with the additional two pieces of oversized stencil. Smooth the entire piece with a scraper.
- Gently spray the glass door panel with the frosted glass spray paint. Follow the directions on the can and apply the second coat. Let set for a few minutes and begin to remove the vinyl stencil.
- Let set overnight to dry.
- When the etched glass is dry, use the clips and screws to attach it to the inside of your door. Hang the door as usual and enjoy your etched glass.
I'm really happy with the results of this project! Some of the spray did peel off a bit when we removed the vinyl, but it's not noticeable at all.
Do you know how to etch glass door panels? Let us know in the comments how your project turned out! Need more DIY Inspiration? Check out these:





Patricia
Hi! I really like the design of the vinyl. ¿Can you please share the file to use on a personal projects?
Thanks!
Patricia