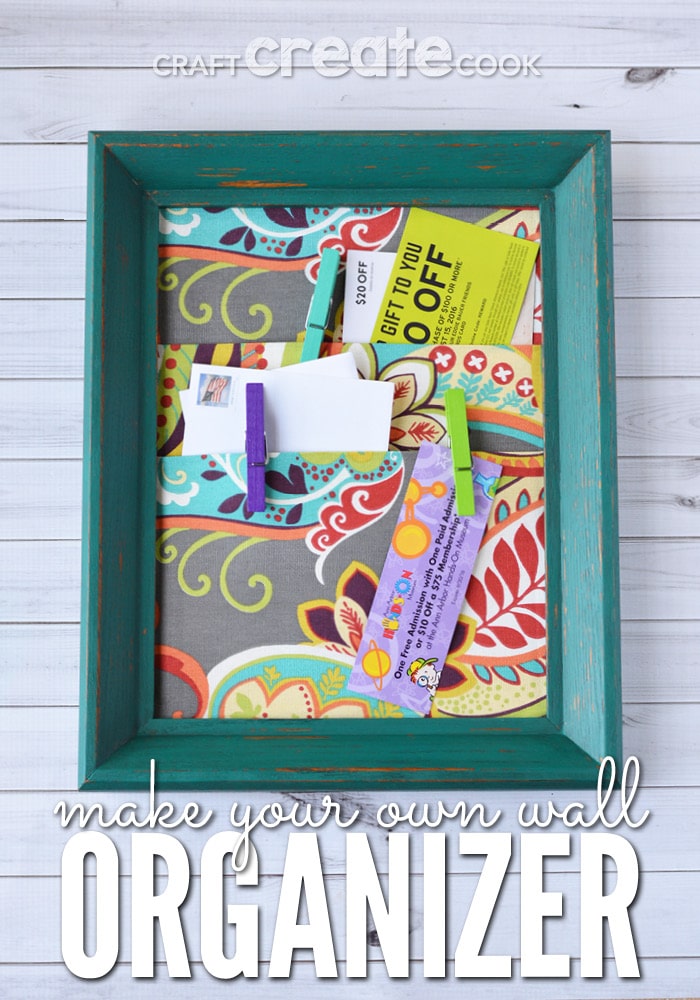
Our easy tutorial on how to make a homemade wall organizer is sure to bring order to your home!
I've been dying to try some Wise Owl Chalk Synthesis Paint since I refinished my shabby chic craft castle chair. When I stumbled upon this wood frame at a thrift shop, I knew I had to have it. I went back and fourth to figure out what I was actually going to do with this frame and I decided on a wall organizer for my kitchen.
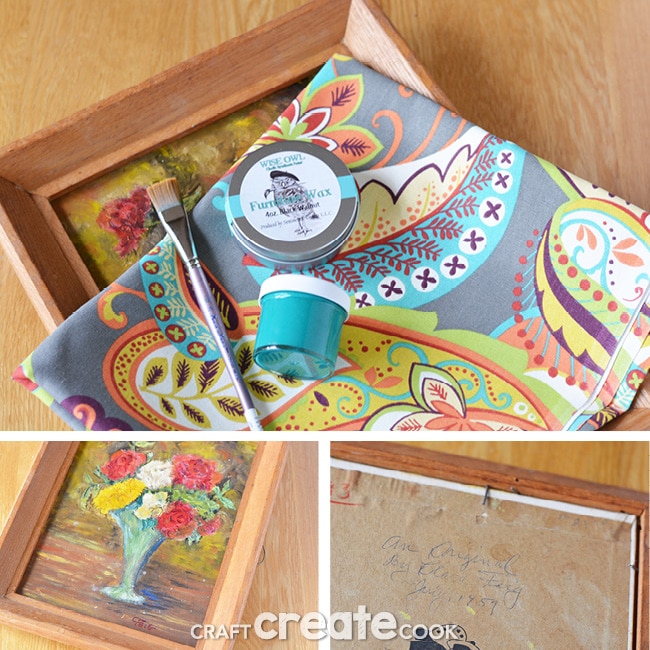
To get started, you'll need a few items:
- Wood frame to repurpose (mine was 15x12 and held a 9x12 piece of canvas) or a new frame (see note below)*
- Wise Owl Chalk Synthesis Paint in Neptune Color
- Wise Owl Chalk Synthesis Paint Furniture Wax in Black Walnut
- 36" x 12" (or as wide as your frame) piece of fabric - my fabric was stiff, a canvas fabric
- hot glue
- scissors
- paint brush
- 300 or 400 grit sand paper
- Remove any images or prints in the frame and nails or fasteners that hold them in place. Reserve if necessary or replace fasteners. Keep the canvas or cardboard that came with the frame. You will need it for later.
I cannot help but wonder if the artist who signed the canvas is famous! - Wipe the frame with window cleaner and let dry.
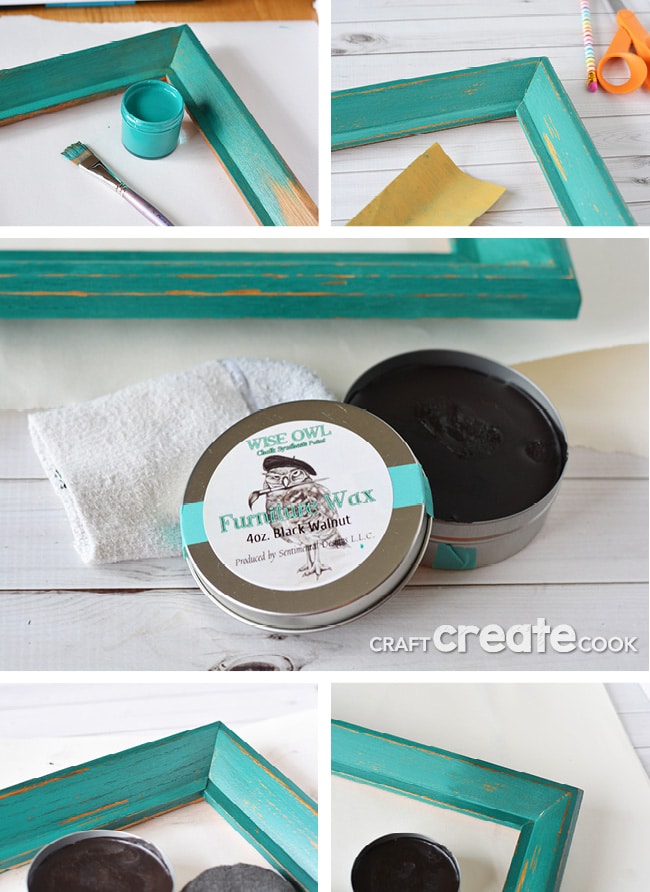
- Add two coats of Wise Owl Chalk Synthesis Paint in Neptune color letting dry between each coat and then overnight.
- Use very fine sand paper to distress the paint, if desired.
- Use a rag (old tee shirts and socks work great) and Wise Owl Chalk Synthesis Paint Furniture Wax in Black Walnut to seal.
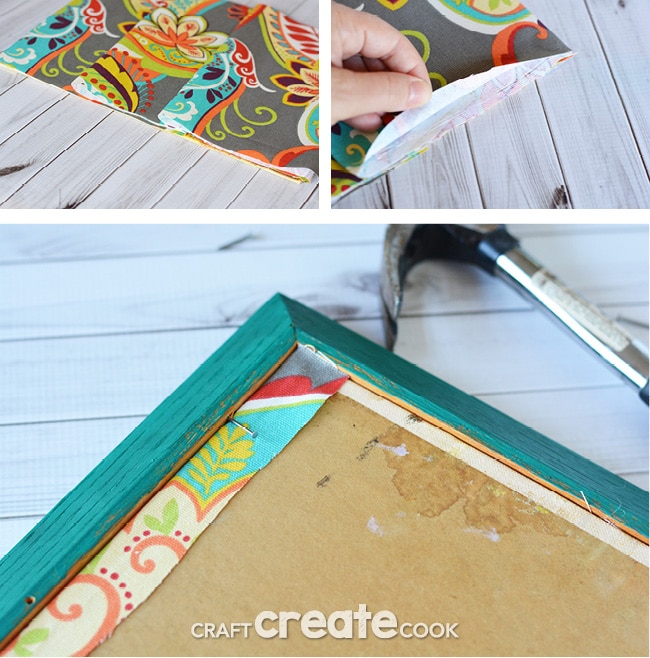
This is where I fell in L-O-V-E. I was absolutely giddy when I slid this wax on the frame. I love, love, love how the black walnut color fills the cracks of the wood grain in the frame. - To create pockets, attach the fabric to the top of the canvas or backing overlapping about 1" and securing on the back with hot glue.
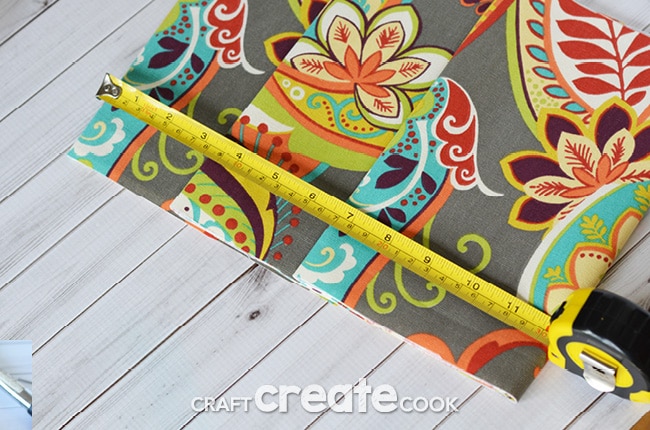
- Fold the fabric upwards two times, in the position you desire to create pockets. I didn't measure my pockets, but you can see by the tape measure shown in the photo what the measurements are.
- Gently flip the canvas and backer over and secure the fabric to the back with hot glue. Make sure your fabric fits into the frame before securing the sides. Trim if necessary.
- Use hot glue to seal the edges of the fabric and glue the pockets to the canvas backer.
- Place the fabric pockets into the frame and secure with existing nails or use new ones.
*If you purchase a new frame, place the fabric on top of the glass and secure it to the glass.
So what do you think? I could stare at this pocket wall organizer for days! And then when I stumbled upon those gorgeous painted clothes pins at the dollar spot at Target, I knew they would bring me to a whole 'nother level of happy!
If you like this project, you'll love making our Chair Refinishing Project and learn How to Cut Pallets for lots of projects! Or try our no cutting required Outdoor Pallet Furniture!




Erica
This is awesome! I wonder if there's anyone who could make one for me. I could use some organization in the bill and mail department.