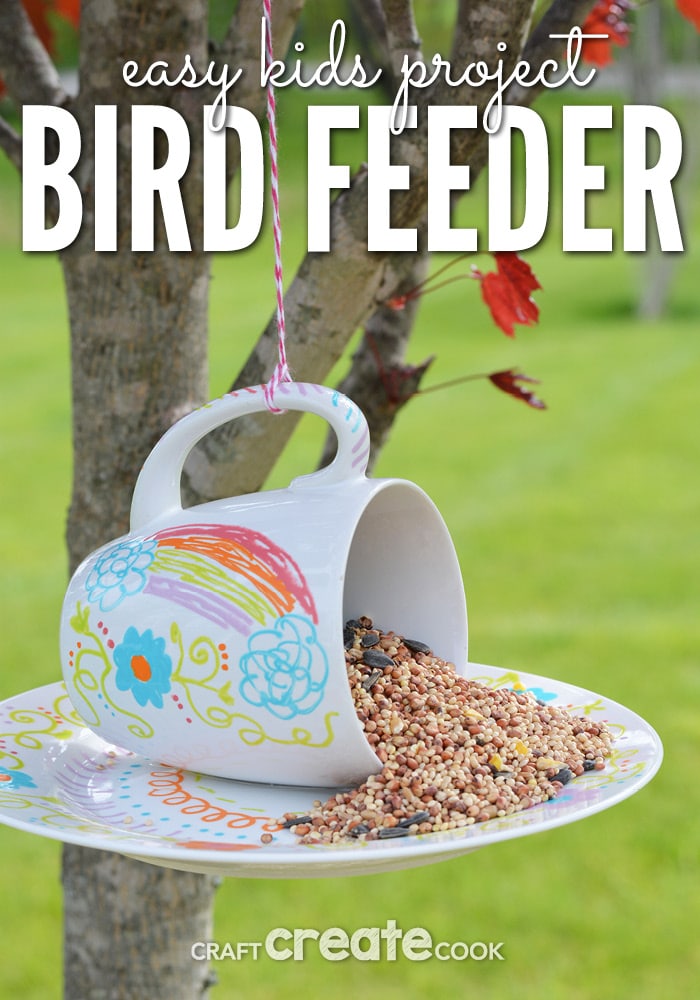
These bird feeders are fun to make and will certainly help attract birds to your yard!
My kids love watching birds. Their grandparents have several feeders right outside their front windows and we see a variety of birds - cardinals, blue jays and chickadees. It's fun to sit in the front room and wait patiently for the birds to come. There are some really colorful and unique ones and it's exciting to get a glimpse of them.
I knew we needed to make these coffee mug bird feeders and I headed to the local thrift store to grab the perfect mug and plate that would make this project a success. While searching for the necessary ceramics, try them out in the store - lay your coffee mug onto a plate and see how it sits. Some shapes worked better than others, but overall almost anything will work. I opted for an 8" plate versus a saucer, because the plate was bigger, there was more to decorate and it could hold more seed.
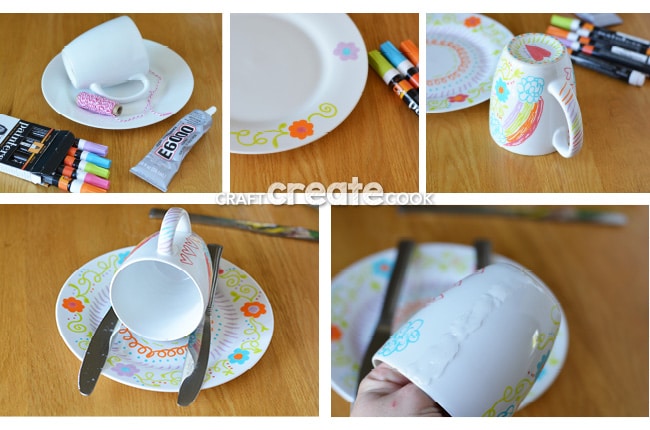
You'll need a few materials once you find your mug and plate:
- E6000 adhesive
- Elmer's Paint Pens in Sherbet Swirl Colors
- 2 Table Knives
- Baker's Twine or Yarn
- Bird Seed
- Ceramic Coffee Mug
- Ceramic Plate or Saucer
- Wash and dry your mug and saucer. This will remove any debris and oils from your fingers.
- Follow the package directions on how to get your paint pens started. It's quite easy, and essential for your creations to come to life.
- Draw on your plate and mug! Anything goes here! You can use a theme or random fun doodles. It's all up to you.
- Set your plate and mug aside to dry thoroughly, about 30 minutes or so.
- When dry, place your mug onto the plate and put 2 table knives next to your mug to hold it in place. Depending on the shape of your mug, you might want to place a knife at the bottom of the mug for additional support. Once your much is positioned where you want it, remove it.
- Add a generous strip of adhesive to the mug and press it onto the plate
- Adjust the knives so the handle is straight up and the mug is supported by the knives. Set aside on a flat surface to dry.
- After about 30 minutes, I checked on my mug to make sure it didn't move. I left mine alone for two days on a table, per the package directions on the adhesive.
- Once the adhesive is completely set up, add twine, hang outside and fill with bird seed.
Note: I did not bake my mug after decorating it. It has since rained and all of the paint is still on my mug that is hanging outside.
After we hung our bird feeders, we were happy to see a new bird which we had fun identifying as an American Bluebird!
Here's another great bird feeder project for the kids!
And enjoy these rainbow ice pops while watching your feeder!

[…] Coffee Mug Bird Feeders – Craft Create Cook […]