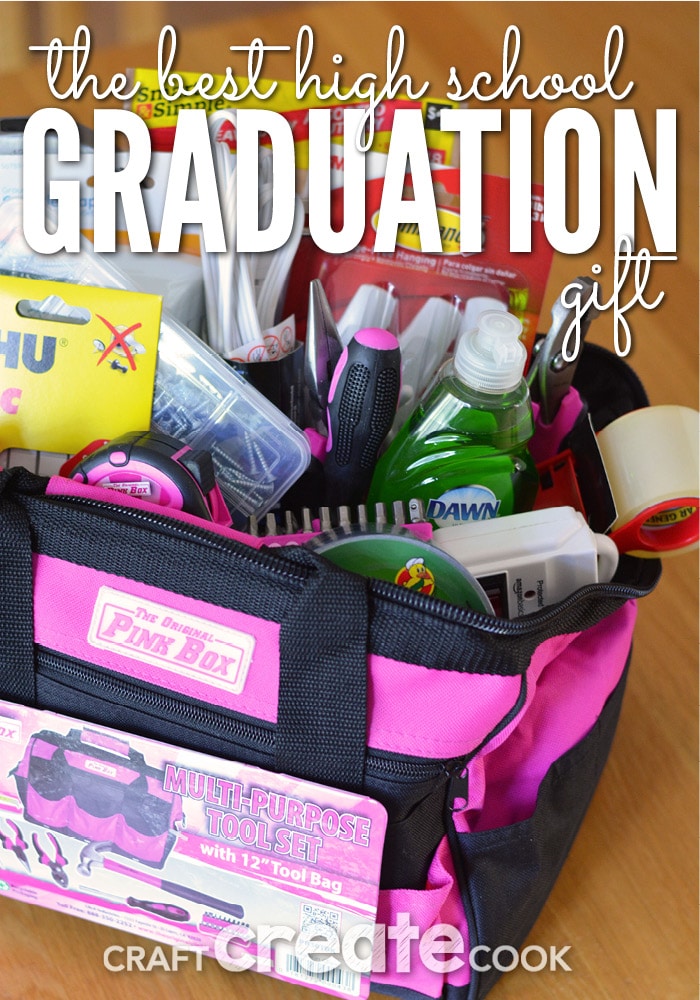
With high school graduation season in full force, you'll want to make this memorable and useful gift for your college bound friends.
My mom is a loyal JC Penney shopper. I remember as a kid she had their credit card - before the days the VISA logo was on it - and every year we got the big catalog and the Christmas catalog in the mail. So when I graduated high school, my mom came across a tool kit in a JC Penney flyer for 20 bucks. She picked it up for me and I took it to college that fall. Fast forward almost 20 years later and I still have that tool kit. This was my inspiration for the BEST (high school) Graduation Gift!
You might be thinking, why on Earth would a freshman college student need with a tool kit while living on campus in the dorms? Well, the first will be when she (or he) buys that shoe organizer and needs a screw driver to put it together. The second will be when her roommate buys the same shoe organizer and the third will be when the neighbor buys a bookshelf that needs to be assembled.
This tool kit was used a lot for the next five years. I remember the neighbors (all guys) my sophomore year knocking on my door and asking to borrow it. Who knows what they used it for, but they were truly grateful and knocked again to borrow it. When I moved off campus, my roommate and I used the hammer to hang pictures on our first apartment walls.
Basic tools are just something you will need in life, and these tools are perfect for that task, plus, the added purple carrying case makes it fun! You won't have to worry about any guy stealing your stuff because it's purple, but I can assure you, he will ask to borrow a purple screwdriver in a time of need! This gift isn't only for women! Men will benefit from this as well!
Besides being very useful for years to come, the other thing I love about this gift is that you can easily adapt to any budget. I've made these for $60-150. The higher priced gifts were joint gifts with one or two additional people.
So what's in this Best (High School) Graduation Gift?
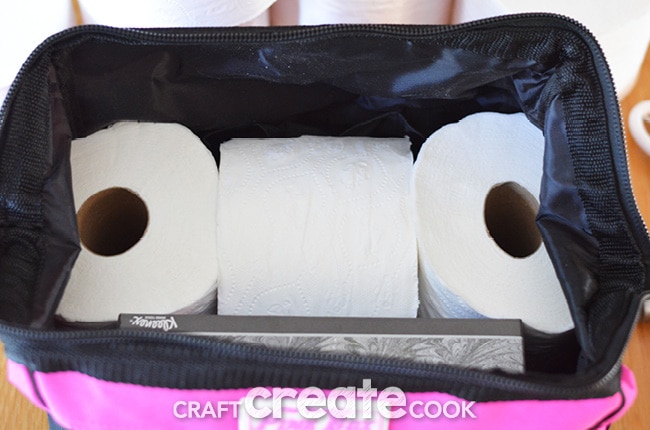
- Toilet Paper. Some schools require you to buy your own, I was lucky enough to be able to obtain toilet paper from housing for free, but it was that crunchy, one ply stuff. I used 3 rolls for this gift.
- Tissue. Because everyone needs to blow their nose! I used one box for this gift.
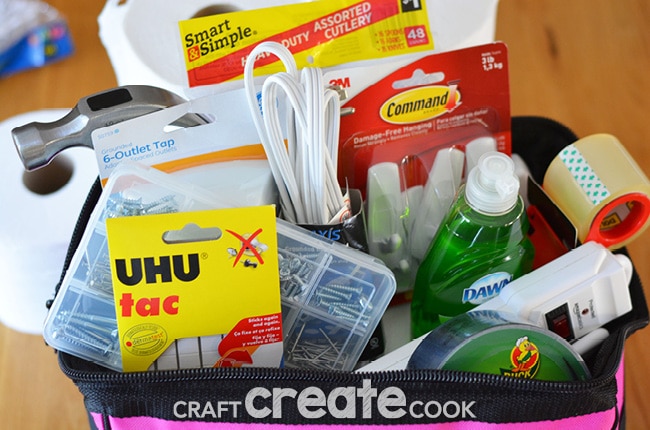
- The Original Pink Box Multi-Purpose Tool Set. (it also comes in lime green, purple and teal) is the main focus of this gift but I added more items that are necessary.
- Dish Soap. Because at some point you may have to wash something.
- Plastic Silverware. For those nights you try to be healthy and order a salad with your pizza, the delivery guy won't come with any silverware.
- Extension cords. This was HUGE for me! My dorm room was built in the 60s, where the only thing plugged in was probably an alarm clock! And now we have microwaves, refrigerators, and electronics, so we needed more than two outlets!
- Power Strip. Again, for all of those electronics!
- 6-Outlet Extender Thingie. You know, one of those adapters that turns a 2 plug outlet into a 6 plug outlet!
- Command Hooks. I wish these things were around when I was in college and had my first apartment! There are so many options to choose from!
- Duck Tape and Packaging Tape. Because you'll need something to seal up that package of shoes you ordered online and need to return.
- Poster Putty. Because schools discourage tape on the walls, and you'll need to put up some pictures to make it feel like home.
- Screws and Nails. This might not be something you need in the dorms, but you will certainly use it later in life when you can pound holes in the walls!
- Cellophane, Clear Tape, Scissors, Ribbon, Bow and Card or Gift Tag. You'll need those to complete this gift!
Other items I recommend include:
- Organizer Baskets. These are great for desk drawers and bathroom organization.
- Super Glue, Adhesives & Glue Remover. These always come in handy.
- Paper Towel, Paper Plates and Napkins. For those late night pizza deliveries.
- Can opener. For those days you have a sore throat and enjoy a can of Condensed Chicken Noodle Soup. I still have my can opener from college.
- Small Bowl and Lid. To heat up that can of soup in the microwave when you are feeling under the weather.
- Reusable Water Bottle. To stay hydrated while in class.
- Gift Cards. It always happens. You move into your dorm room and need something - a rug, closet organizer, more hangers. Gift cards to stores near the school are very nice. Restaurant and Pizza gift certificates are also great. Or, gas cards if the student will be taking a car to college. Or if your options are limited, grab them an Amazon gift card so they can purchase almost anything and have it shipped directly to them.
- Small Sewing Kit. For those times when you lose a button and don't have $8 to pay a seamstress to put it back on.
- Candy or Portable Snacks. Non perishable items such as a big bag of m&ms, little bags of trail mix, gum, mints, things you can grab and go to class!
Now to the how-to part of this gift. Really, you CAN put together a gift basket, it's not that hard! The key is the BASE...you know that song...It's all about the base...Well it's true in this case. Let's start assembling your gift basket!
- Place all of your items in front of you. I took the power strips out of the brown box they came in, I opened the tool box and removed all the stuffing and placed the tools in front of me. I gathered three rolls of toilet paper from my stash and a box of tissue. If you opt for organizer baskets, you can put those on the bottom instead of toilet paper and tissue.
- Open your tool bag and place the toilet paper and tissue inside to fill the bottom and create the base. Stick the hammer into one of the rolls of toilet paper so it sticks up. Begin to layer your items from back to front, largest to smallest in the bag, on top of the toilet paper and tissue.
- There's no rule to how to organize this basket and nothing needs to be in a specific place which makes it nice! Once everything is full you'll need to wrap it up!
- Cut a piece of curling ribbon about 14" long and place nearby.
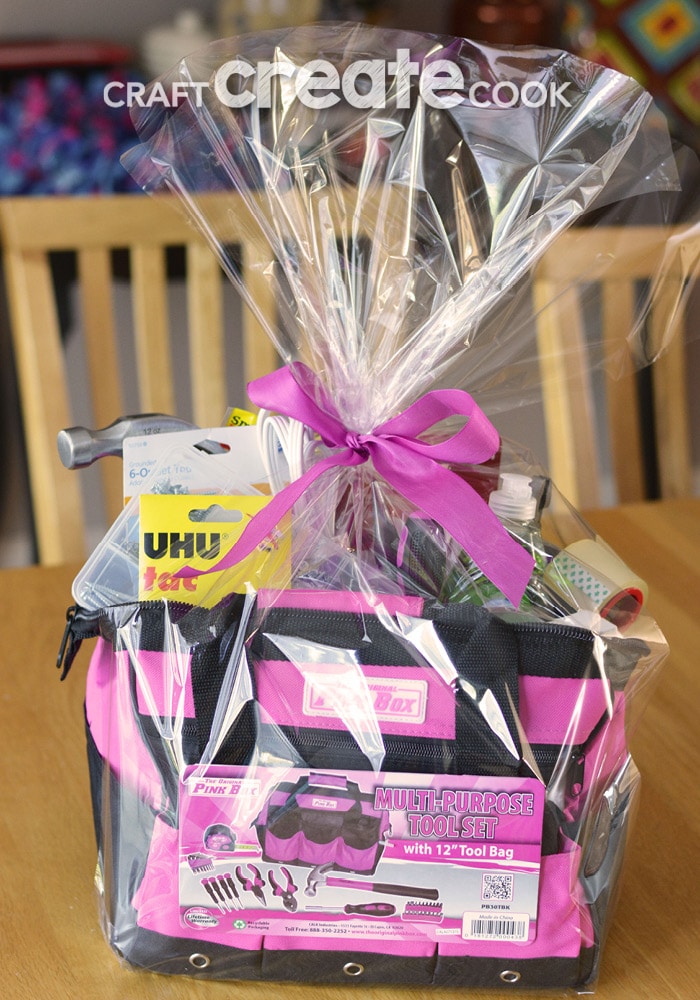
- On a large table, unroll your cellophane and place your basket in the center. You'll want at least the height of the basket plus half the height of cellophane in front of and behind the basket. So 1.5 times the basket height. This will ensure you have enough cellophane for the top. To check, pull the cellophane up to the top of the basket and add about 12-14" beyond that. Center the basket as best as you can and trim the roll of cellophane.
- You'll probably see the basket is small in terms of the cellophane, therefore we'll need to cut one side. Move your basket to one side of the cellophane, so there's about 4-6" extra. Trim the other side so it extends the same amount, 4-6" beyond the basket.
- Lift each end of the cellophane to the basket. You'll tighten your grip on the cellophane near the center and back of the basket so it sits nicely. Pull securely and tie with ribbon. Double knot.
- If your cellophane isn't even at the top after cutting, simply trim it now to be (somewhat even).
- Add your bow and tag to the top
- To finish the sides, we almost "wrap" the basket by folding the sides inward and then down and taping them to the bottom of the basket. I use clear tape for this. Repeat on the other side.
You can easily make this gift ahead of time, but cover it with a lightweight trash bag or tissue paper. The cellophane tends to attract dust and pet hair.
You'll also want to check out: Gift Card Jar and Dad & Me Father's Day Gift






[…] Check out this fun kit here: www.craftcreatecook.com […]