This shop has been compensated by Collective Bias, Inc. and its advertiser. All opinions are mine alone. #nothinglikeahug #CollectiveBias
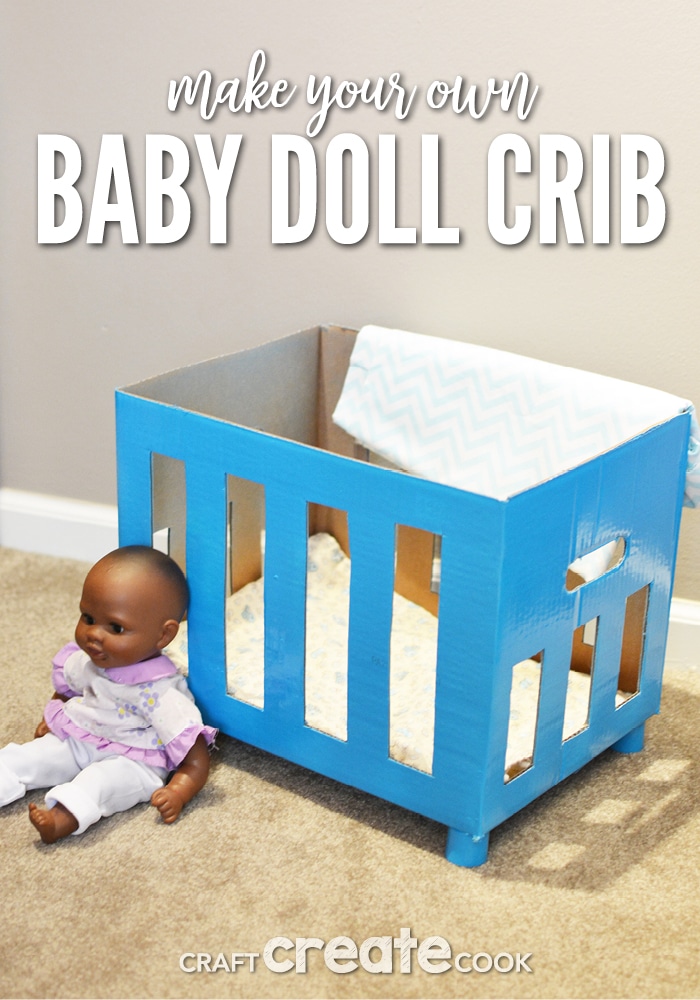
Reuse a box to create a DIY baby doll crib for hours of fun!
Every parent remembers that feeling of being "diaper free" when your child is officially potty trained. Unfortunately nighttime potty training usually means waking your child up every few hours to use the potty or simply putting him or her into a diaper or pull-up.
My 4 year old has been potty trained for quite some time. In fact, he seemed to potty train himself around 2-½ years. But, at night, that's a different story. We use GoodNites® to manage his nighttime wetness, because I'm not getting myself out of bed to make him use the bathroom, nor am I stripping the bed in the middle of the night when he has an accident!
Hover over the photo in order to click through and purchase the items used in this tutorial!
My favorite place to grab GoodNites® is Sam's Club! As a member, I know that's where I can get the most amount of NightTime Underwear for the most affordable price. Right now, you can head to Sam's Club to grab $4 in Instant Savings on Huggies products (valud 12/1-12/25). PLUS get an additional $4 through Ibotta when you buy Huggies at Sam's Club!
My favorite Sam's Club feature is the Club Pick-Up Service. I simply log into my account, put items into my cart and pick them up when I'm ready! My favorite part of this is that I can send my husband to the club after work to grab the items I purchased. This is a total time saver for ANY family!
One thing I like to do with the leftover packaging is to make my son a Baby Doll Crib! Yes, I let my son play with dolls! No harm there! Men must learn at some point in their lives to care for others, and babies, too! Plus, his older sister is my son's biggest role model, and I'm not going to stop a happy, fight-free, sibling playtime when they play dolls and house together!
How to Make a DIY Baby Doll Crib
Materials:
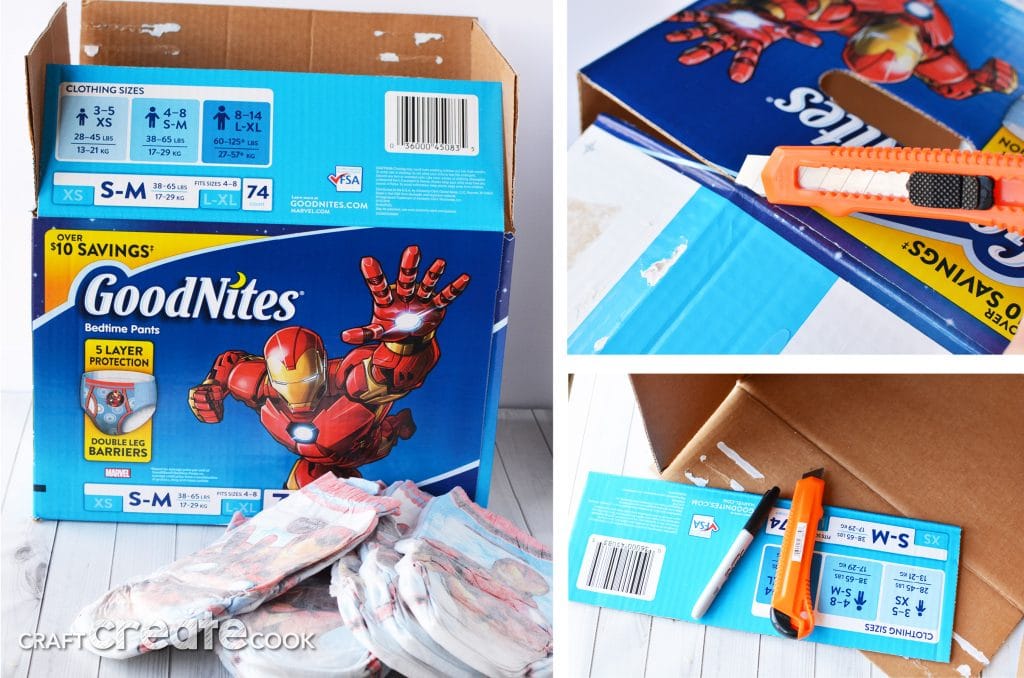
- Empty Cardboard Box (A GoodNites® box is perfect!)
- Ruler
- Permanent Marker
- Utility Knife
- White Spray Paint
- Colored Spray Paint
- Caps or Scoops for Crib Legs
- Tacky Glue
Directions:
- Empty the product from your box. Using a utility knife, trim the four flaps off of the box. Discard or recycle. Trim the handle flaps from the sides of the box.
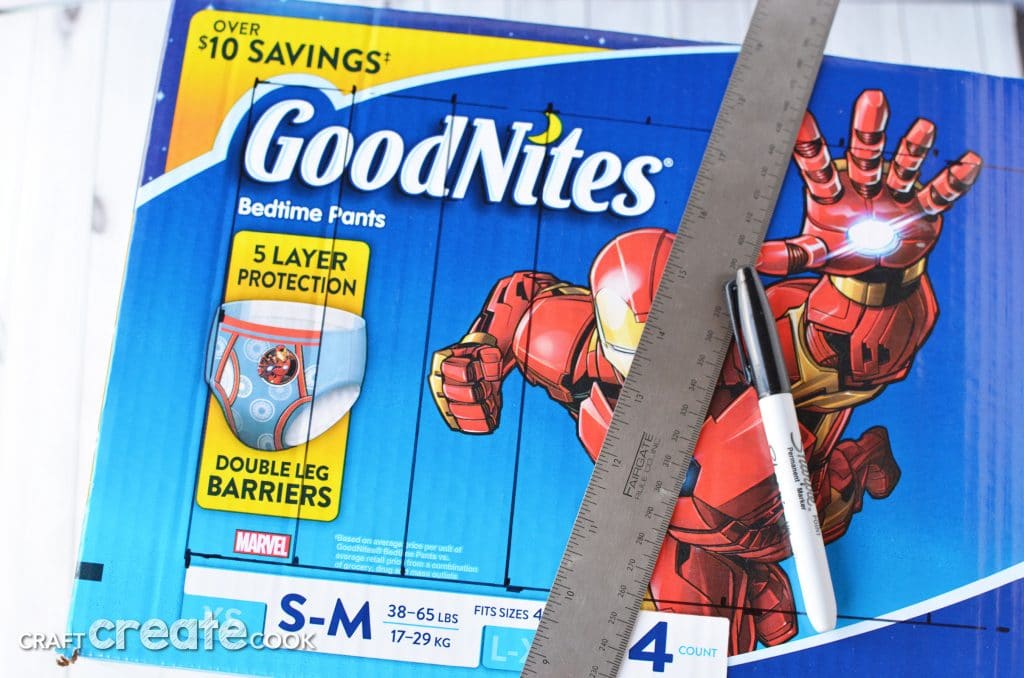
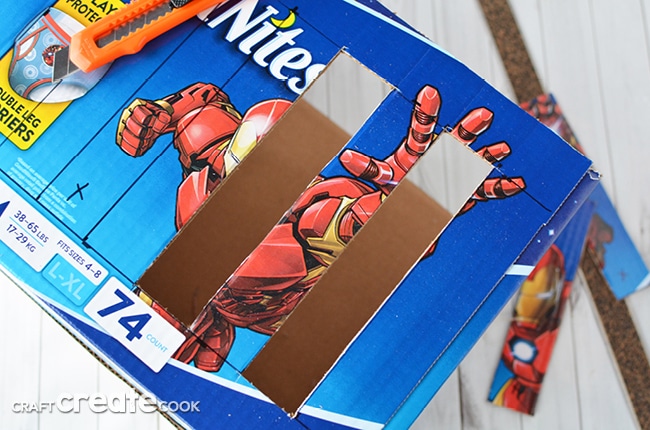
- Use a ruler to measure 1.5" all the way around 1 side of the box. Mark it with a permanent marker. Add slats, 1.5" apart in the remaining portion of the box. Repeat on all four sides so you have a crib with slats on the sides.
- Use a utility knife and ruler to cut out every other slat on all 4 sides of the box.
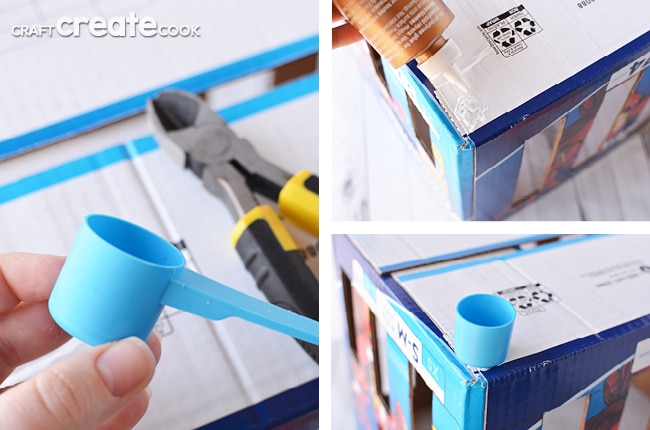
- If adding legs, you may need to trim the ends of your scoops. Using diagonal cutters, trim off the scoop handle and discard or recycle the handle.
- Using tacky glue, attach caps to the bottom of the box to create legs. Let dry completely.
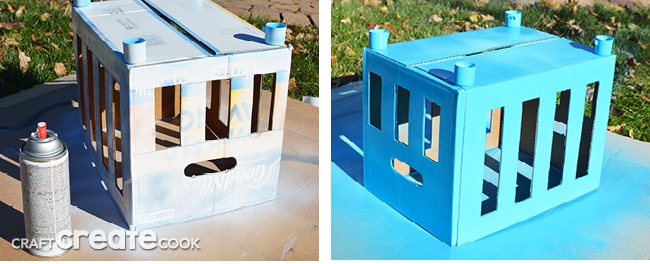
- In a well ventilated area, and according to the package directions, spray the box with white spray paint. I used a spray paint that had paint and primer in one and used two coats. Let dry between coats.
- Spray with color spray paint. More than one coat may be necessary. Make sure you let your paint dry between coats.
- Once dry, add some bedding and a baby to your crib and you're ready to play!
Need some additional DIY playtime projects?
- Make Your Own Donuts are a no sew project to encourage fun dramatic play!
- No Sew Doll Sleeping Bag would be a perfect accessory for your doll crib!
- Trolls Fairy Garden for magical playtime!




Melanie
I have seen several neat cardboard box ideas, but this is my first time seeing this creative idea! My kids would like this. #client